Setting up your school
After Signing Up/Logging In, set up your school from the getting-started hub. It appears at the top of the dashboard the first time you sign in as a school manager and guides you through everything needed to get your school ready.
Work through the steps in any order. You can leave and come back at any time, and the hub keeps your progress until every step is done.
The getting-started hub
Section titled “The getting-started hub”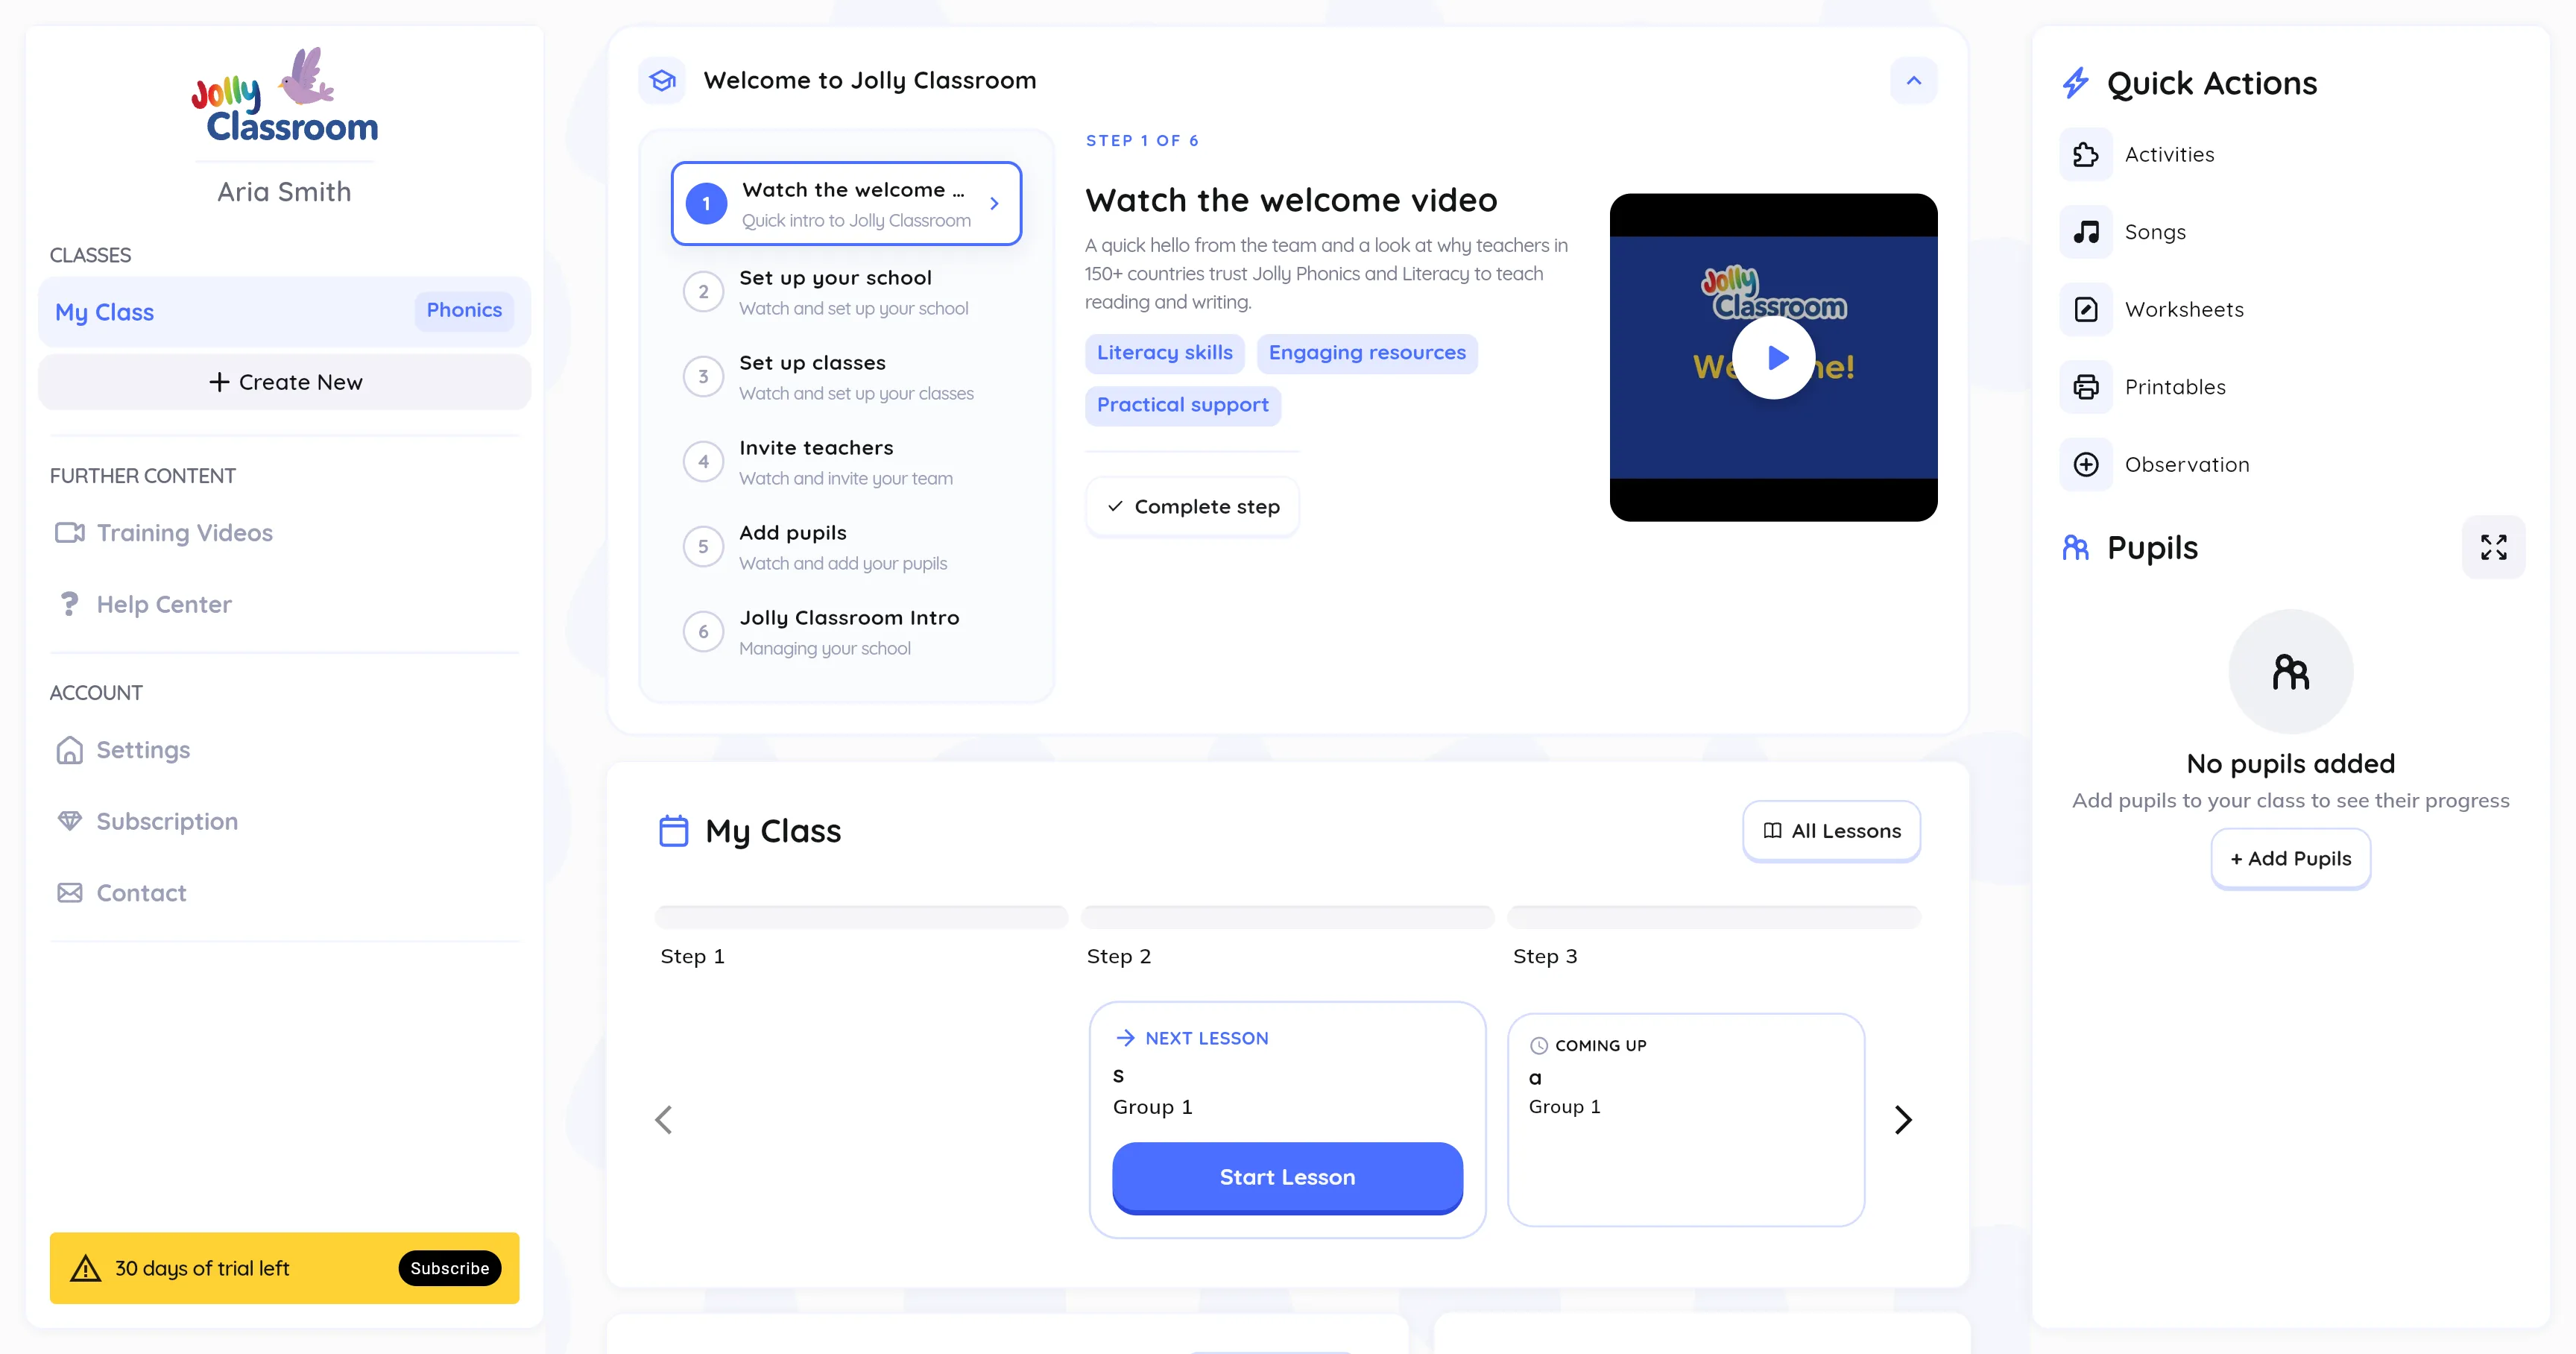
The manager hub has six steps:
- Watch the welcome video: a quick intro to Jolly Classroom.
- Set up your school: school details, accent, font, and privacy.
- Set up classes: create your classes and pick their courses.
- Invite teachers: add your team and assign them to classes.
- Add pupils: add pupils manually, by CSV, or sync from Wonde.
- Jolly Classroom Intro: where to find the key features for managing your school.
Select a step to watch its video, then use Complete step to mark it done. Steps 2 to 5 also open the relevant tool.
Step 1: Set up your school
Section titled “Step 1: Set up your school”Select Set up your school, then click Set up school.
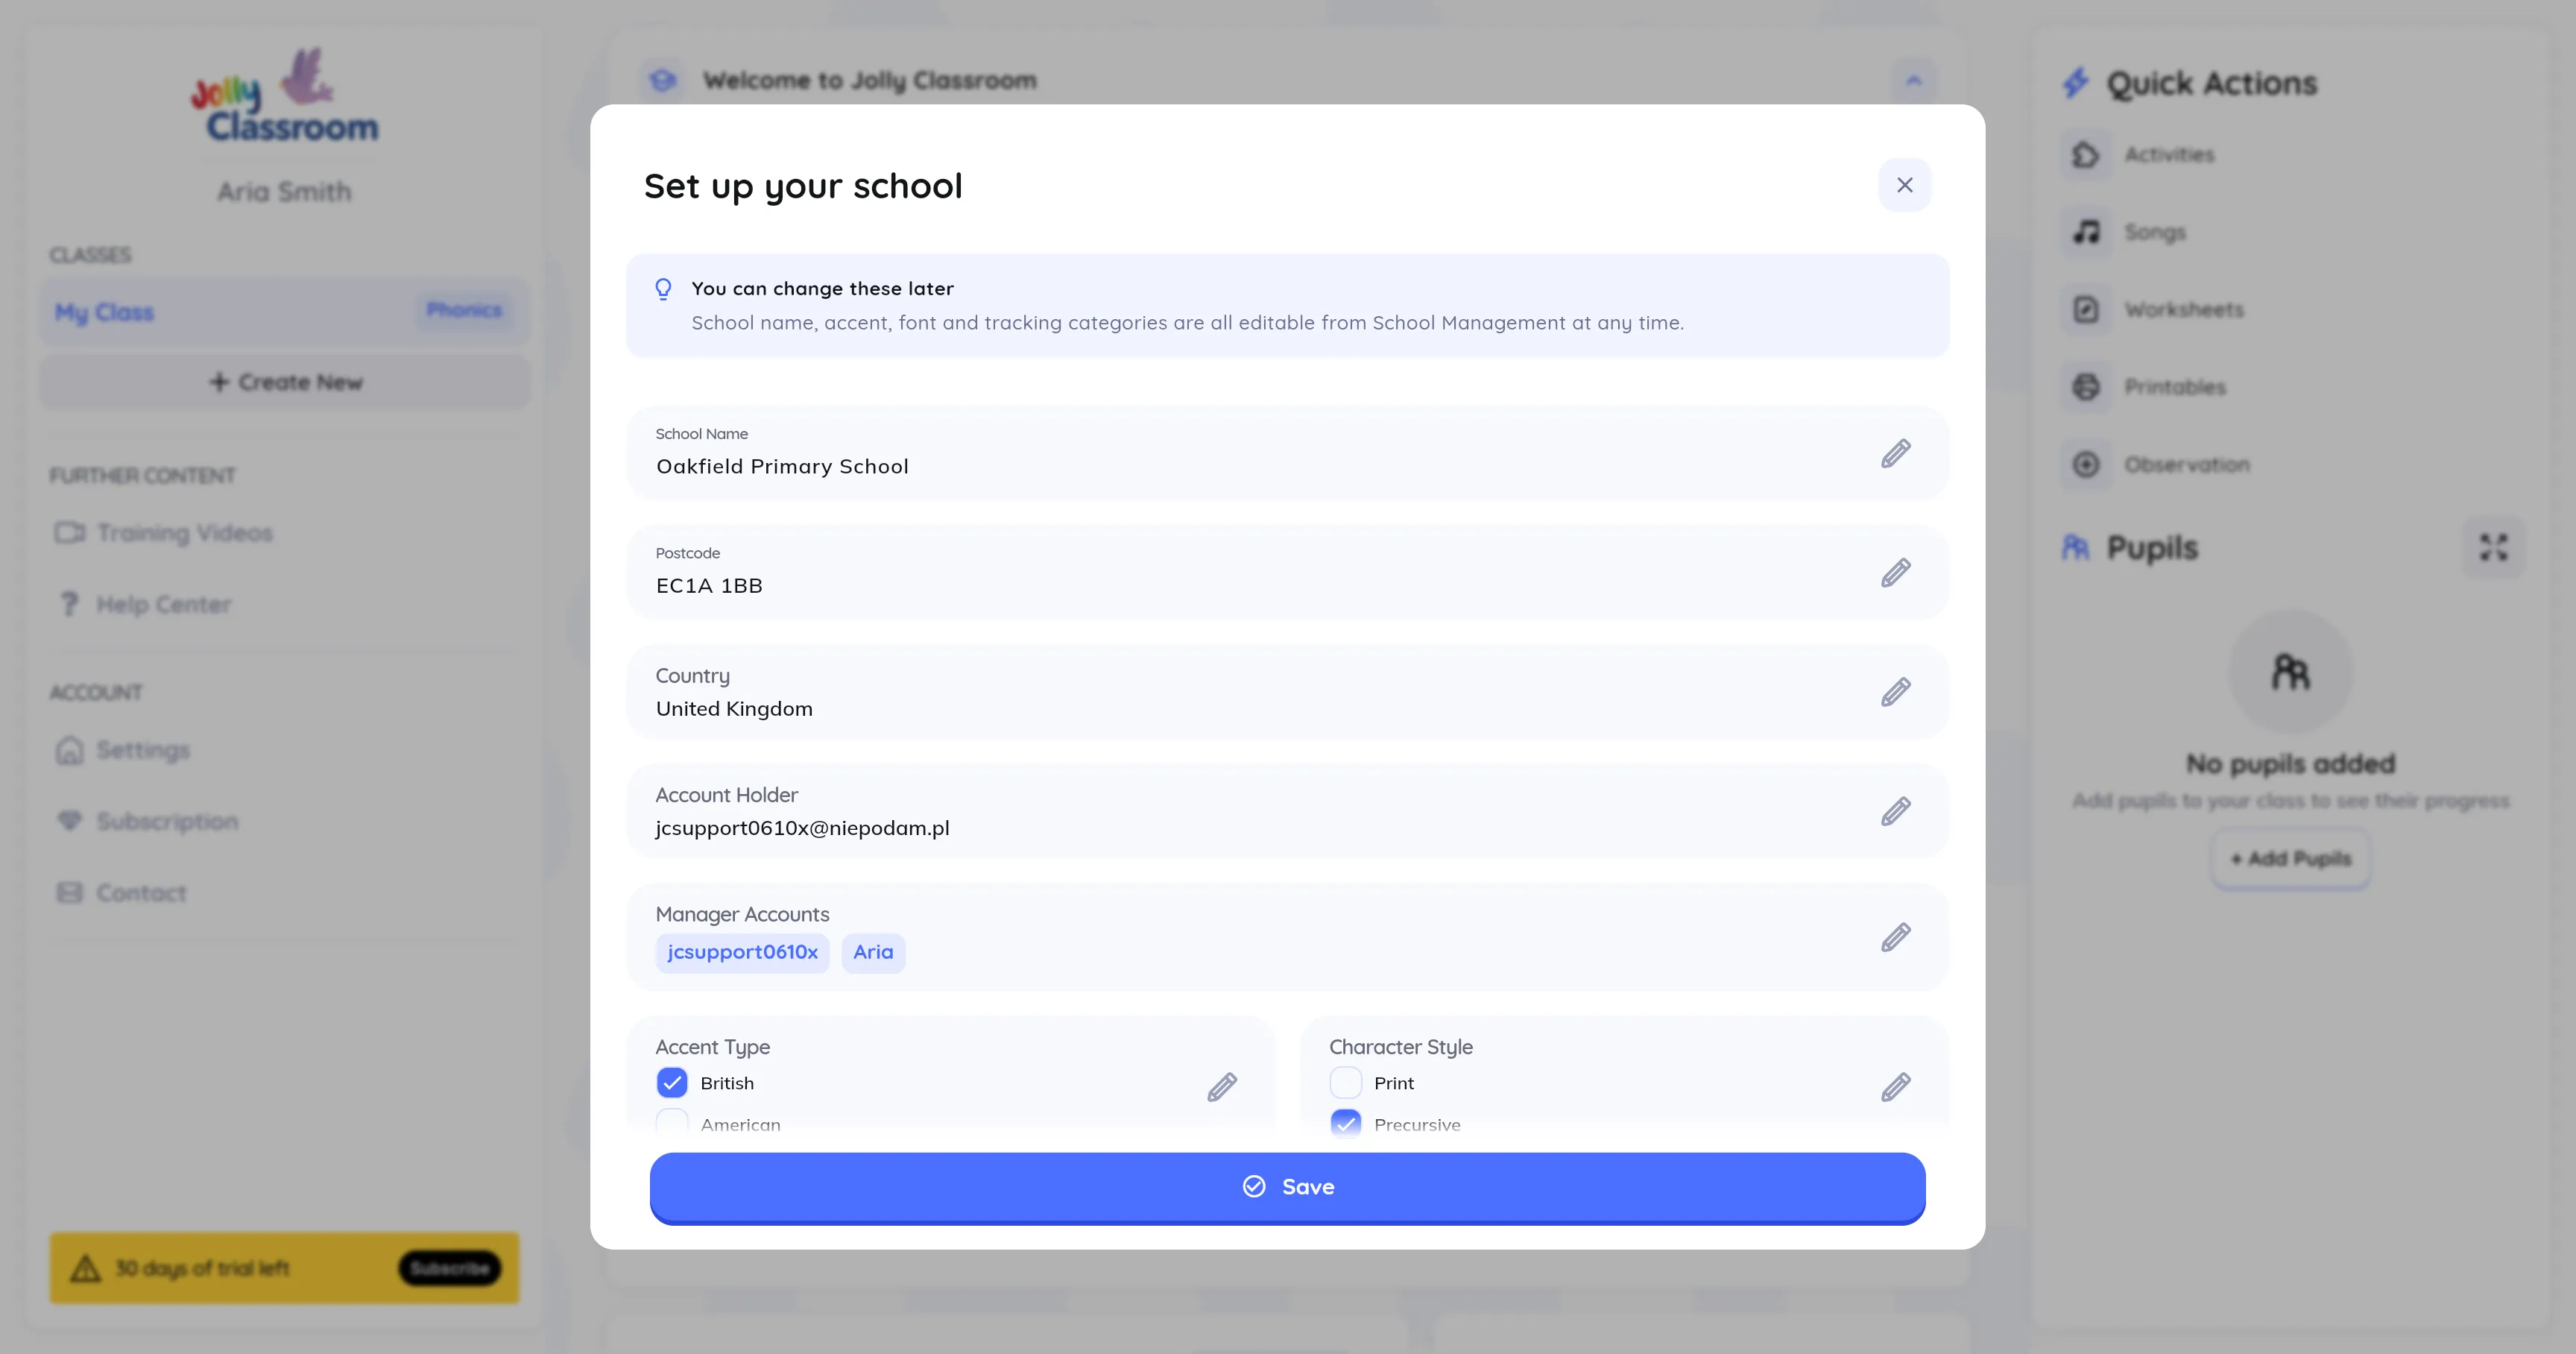
Set your school details:
- School Name
- Postcode
- Country
- Account Holder: the main account for the school
- Manager Accounts: other teachers who can manage the school
Scroll down for the remaining options:
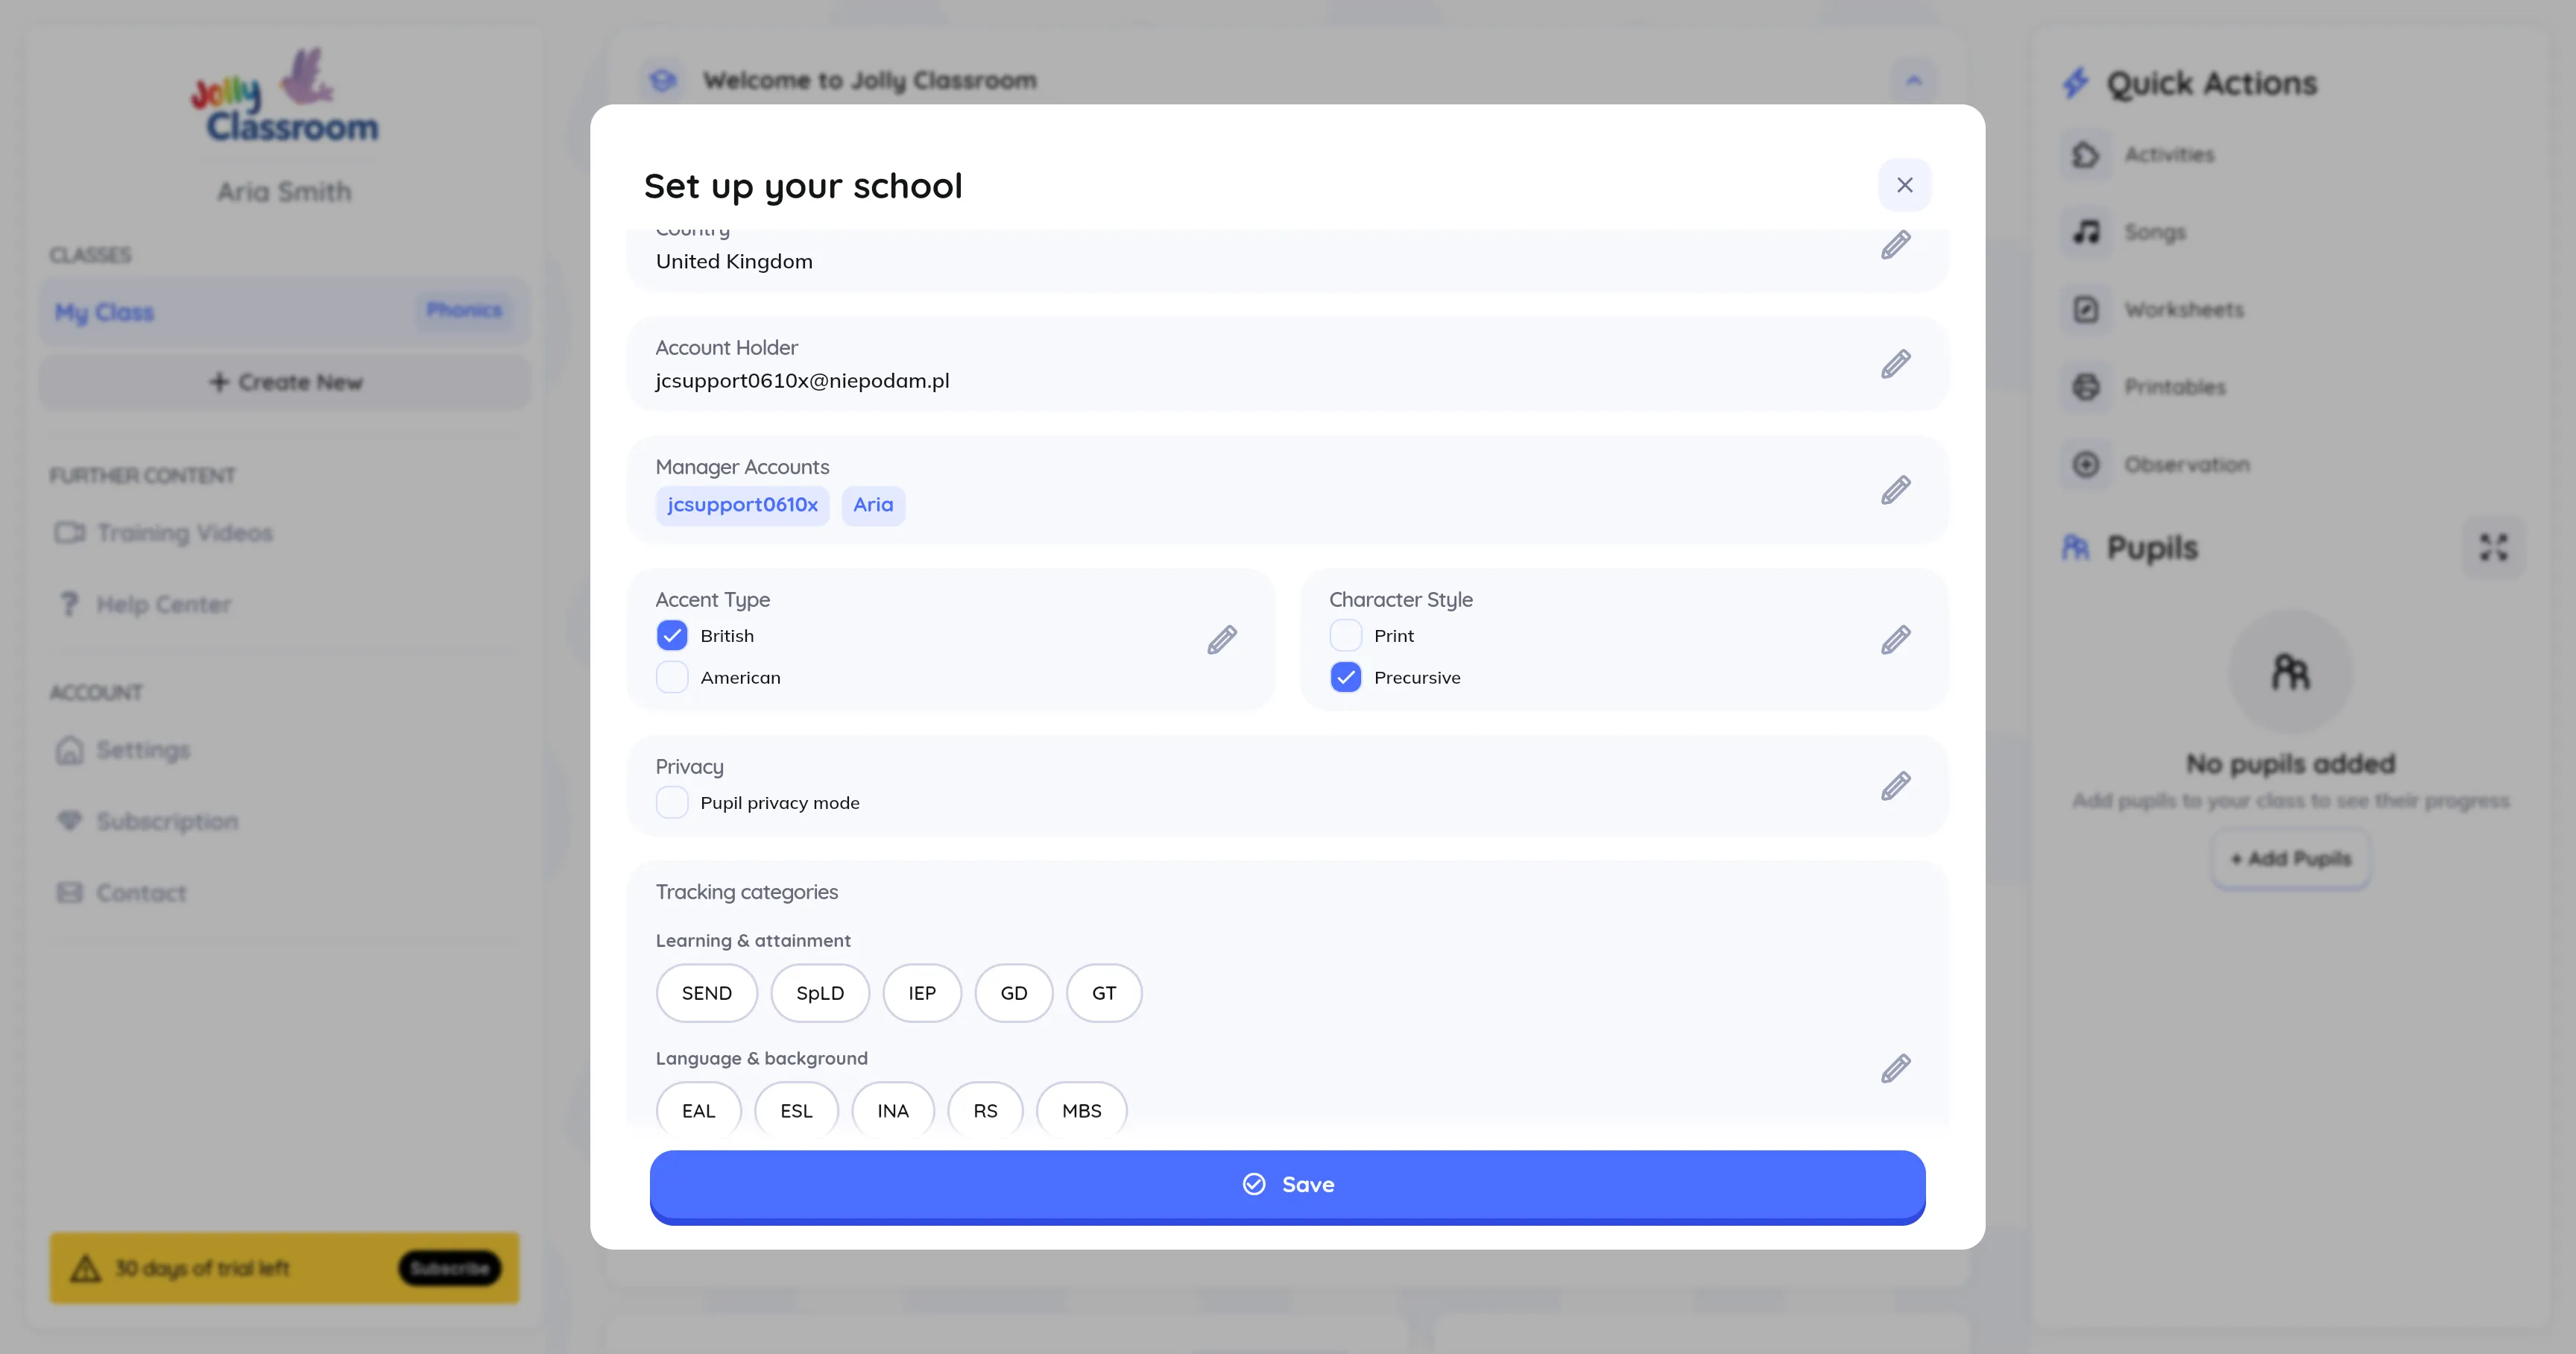
- Accent Type: pick British or American. This sets the accent used across activities and teaching materials.
- Character Style: pick the handwriting style (such as Print or Precursive) used in the app and printable resources.
- Pupil privacy mode: turn this on to hide pupils’ name, surname, and picture, identifying them by ID instead.
- Tracking categories: choose which categories (such as SEND, EAL, or Pupil Premium) are available when you add and group pupils.
Click Save when you’re done.
Step 2: Set up classes
Section titled “Step 2: Set up classes”Create your classes and assign each one a course (Jolly Phonics or Spelling, Grammar & Punctuation). A class called My Class is created for you when you sign up.
See Managing Classes for the full guide.
Step 3: Invite teachers
Section titled “Step 3: Invite teachers”Add the rest of your team, assign them to classes, and choose who else can manage the school.
See Inviting and Managing a Teacher for the full guide.
Step 4: Add pupils
Section titled “Step 4: Add pupils”Enrol your pupils manually, import them from a CSV, or sync them from Wonde. Assign each pupil to a class so their progress and assessments are tracked.
See Managing Pupils for the full guide.
Finishing up
Section titled “Finishing up”Once the manager steps are done, Jolly Classroom offers to continue with teacher onboarding, a shorter flow focused on teaching your first lesson. Jump in now, do it later, or skip it.