Managing Pupils
The account holder and managers can add and manage pupils across the school. Any teacher assigned to a class can manage the pupils in that class.
-
Open Settings
Click Settings in the sidebar, then open the Pupils tab. You can also add pupils from the Pupils panel on the dashboard.


-
Add pupils
You have three options:
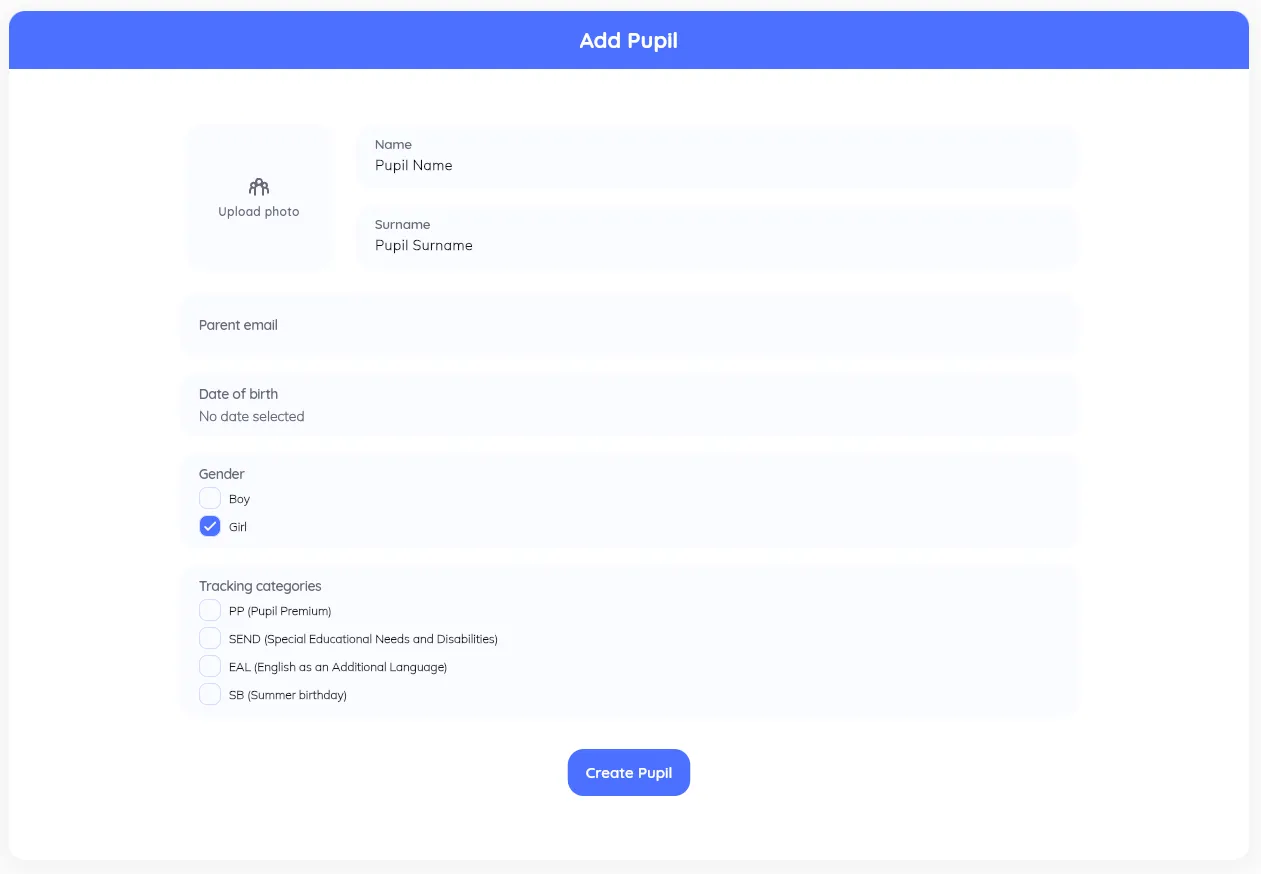
- Create Pupil: add a pupil by hand.
- Import from CSV: add many pupils at once from a spreadsheet.
- Wonde: sync your pupils from Wonde.

When creating a pupil by hand, you can set:
- Name and Surname
- ID
- Photo
- Date of birth
- Gender
- Tracking categories (these come from the ones enabled in Settings → School Settings)
Click Create Pupil, then assign their classes with the pencil icon next to the class list.
-
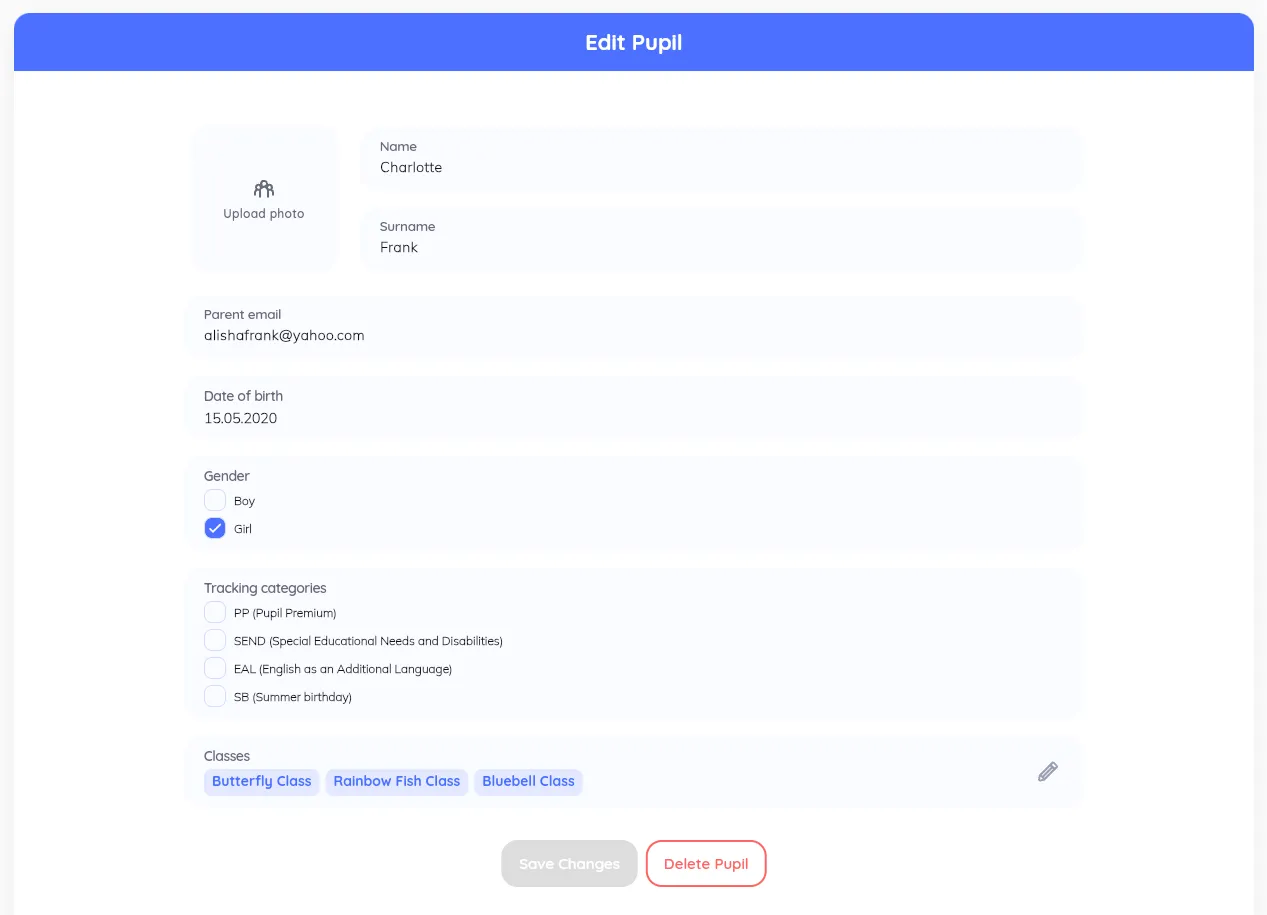
Edit a pupil
Click a pupil to open their details, where you can update their information, change tracking categories, and add or remove them from classes. Save with Save Changes.
-
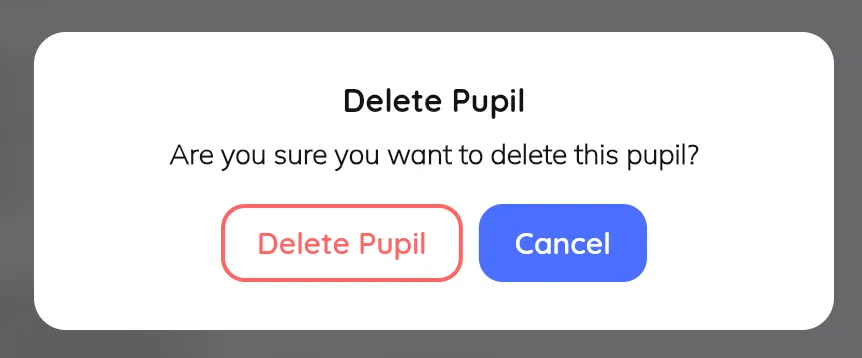
Remove a pupil
Open the pupil and remove them. Only the account holder and managers can remove pupils from the school.